Hello DIYers! Now that it's November, it's the perfect time to sit on the couch, bundled up with pillows and blankets. Now, I don't know about you, but I use Emojis ALL the time when I am texting my friends. That's why these DIY NO SEW Emoji Pillows are the bomb.com! Anyways, let's get started with the DIY!
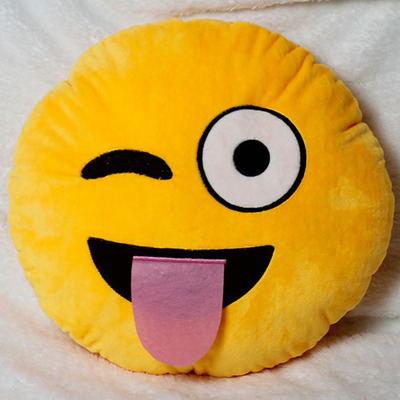
THIS IS A DIY FOR THE FOLLOWING EMOJI. (There's so many emojis, it would take FOREVER to do a tutorial on each one!):
What you'll need:
- 2 large yellow fabric circles of the same size
- Black, Pink, and White fabric
- Scissors
- Hot Glue
- Stuffing
Steps:
1. Cut out the shapes of the emoji. This means: make a mouth-shape with the black fabric, a half-oval shape with the pink fabric, a black circle with the black fabric, a smaller circle than the black circle with White fabric, and a lima-bean shape with the black fabric.
2. Hot glue the pieces onto one of the yellow fabric circles, as shown in the picture above!
3. Let dry
4. Outline 3/4 of the two yellow fabric circles together with hot glue, but make sure that the circle with the emoji face on it is on the INSIDE. (Does that make sense?)
5. Turn emoji pillow-pocket looking thing inside out (now the emoji face should be on the outside!)
6. Fill with stuffing!
7. Glue the remaining outline of the emoji together, and let dry!
You're Done!
I hope you enjoyed this tutorial! Stay tuned for more coming soon!