Happy May! Today's tutorial is how to make a DIY Mason-Jar Bank, since we all know that summer is coming up, and you want to save up for that cute swimsuit you've been eyeing for the past week. I know- I know what you're thinking. You're thinking about the last time you used one of those bank containers to put your money in, which was probably yeeeeeeaaaaaaarrrrrrssss ago. I actually still have mine from when I was a kid, and I still use it! (It just has like, $15 in it.) Since Mason-Jars have been super popular over the past year, why not make a Mason-Jar Bank?! Let's get started.
1. Go to your local craft store, and buy a Mason-Jar. (See pic below if you don't know what a Mason-Jar looks like.) Don't get one with a brand engraved inside.


"It makes Sense to Make Cents"

1. Go to your local craft store, and buy a Mason-Jar. (See pic below if you don't know what a Mason-Jar looks like.) Don't get one with a brand engraved inside.

2. Buy acrylic paints, washi tape, sharpies, whatever you want to decorate the jar.


3. Unscrew the lid from the jar. There should be a lid, and that little metal round thingy. WITH PARENTAL VISION, take a drill, and drill a hole into the little metal round thingy, a size that will fit money/coins inside.

4. Decorate the jar with the materials you bought in step 2!!! You could write the name on the jar of what you're saving up for, or if you can't think of anything, here are some ideas to get you started.
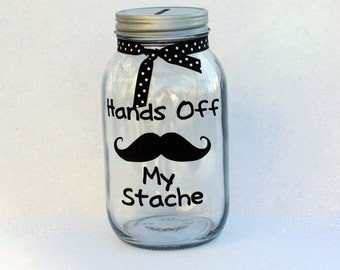
"Hands off my Stache"
"Get funds to have fun!"
"_______________'s bank!"
"CA$H MONEYYYYYY!"
"It makes Sense to Make Cents"

I hope you enjoyed this DIY Mason-Jar Bank!
-DIY With Madi